Step by Step
Hiding the raw trace
Start Acquiring live video and Doppler signal.
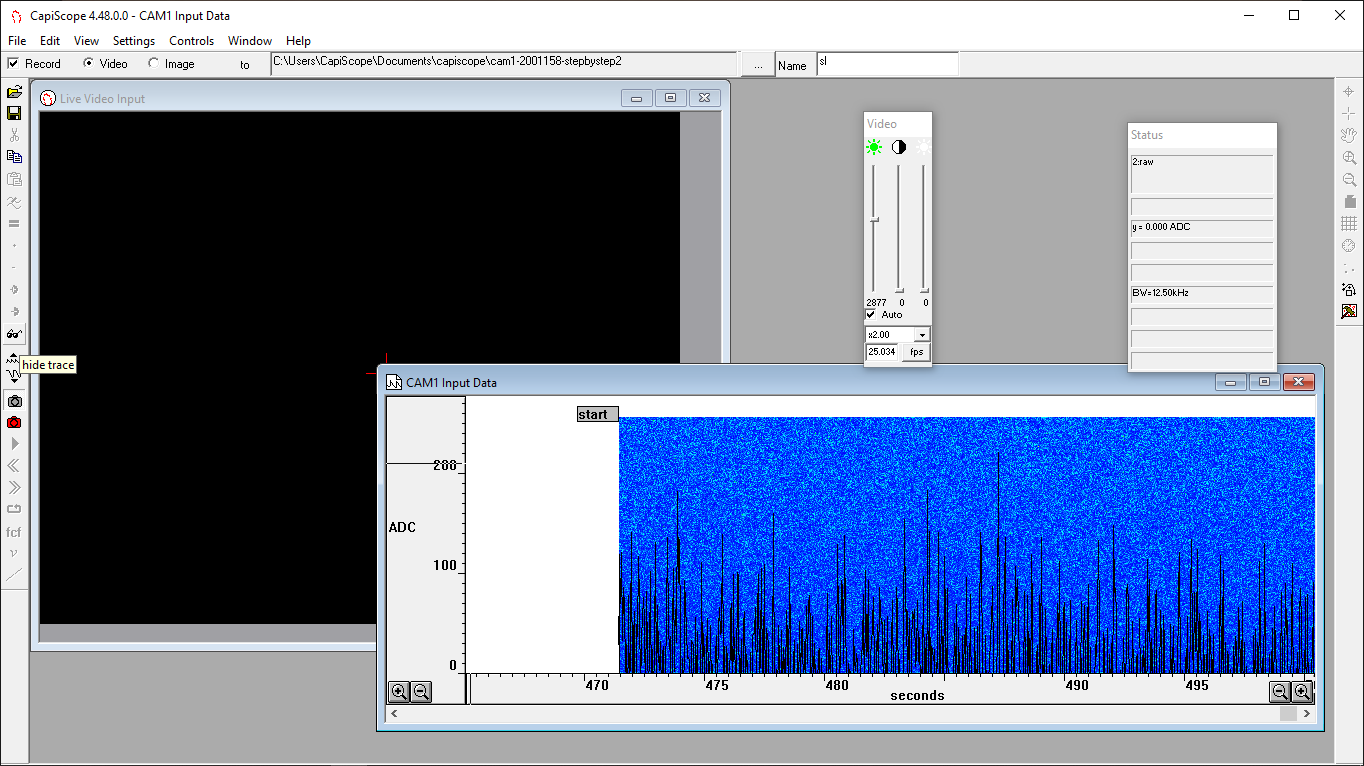
2. If the Doppler shift “raw” trace is enabled, use the keyboard TAB key to activate the “raw” trace with the CAM1 Input Date window active.
Use the “hide trace” toolbar button to hide the raw trace.
Use the TAB key to activate the “Doppler” trace.
Demonstration video
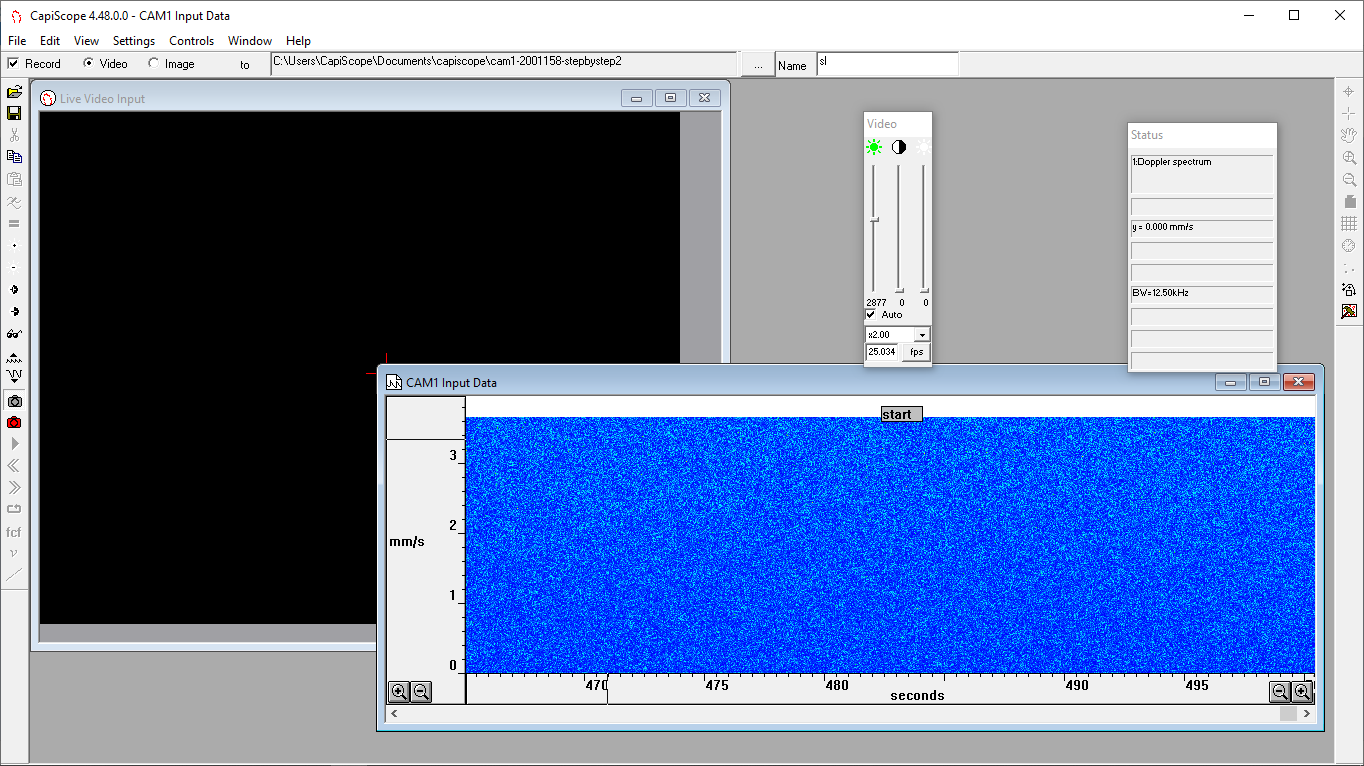
Adjust Doppler Contrast/Threshold
5. Use “contrast” toolbar buttons to adjust the level of visible noise shown in the Doppler trace. This also adjusts the threshold value used to find the CBV value from the Doppler shift.
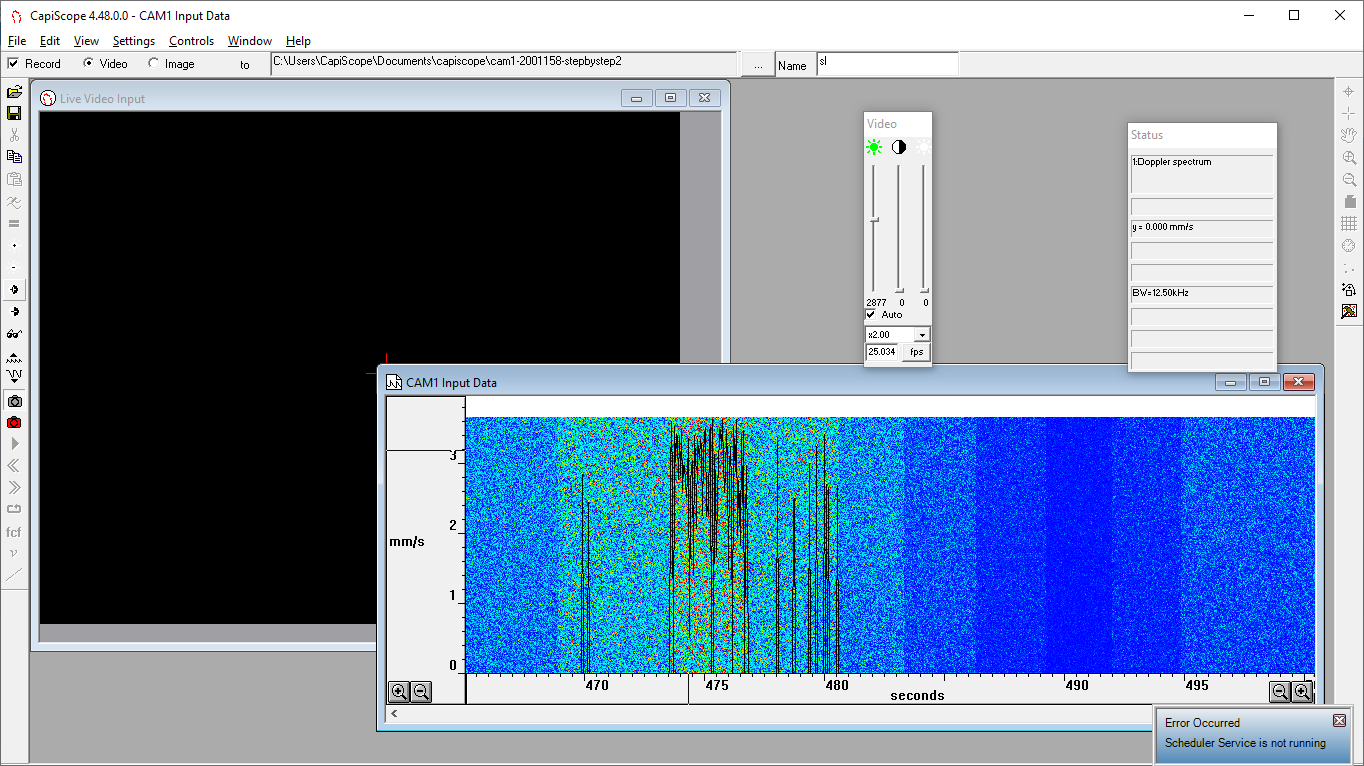
6. Start of with a noise level like this. The threshold can be readjusted in saved recordings.
Demonstration video
Adjusting Doppler Bandwidth
7. Here we can see that there is a quite normal low CBV of less than 1mm/s.
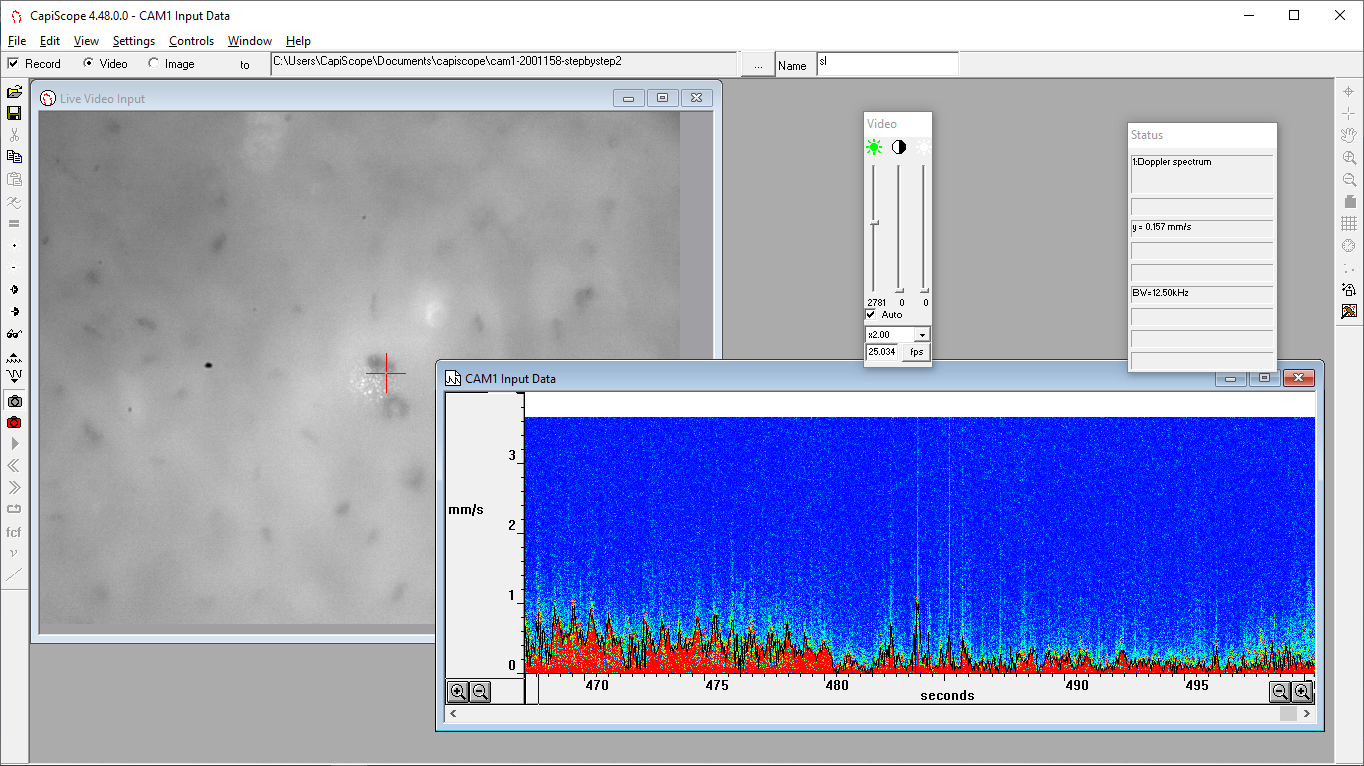
8. The current bandwidth is 12.5kHz, this could be stepped down to the next bandwidth of 6.25kHz
9. Use the Bandwidth toolbar buttons to step through the bandwidths 6.25, 12.5, 25, 50 kHz.
Here is a high CBV, so a bandwidth of 25kHz has been used.
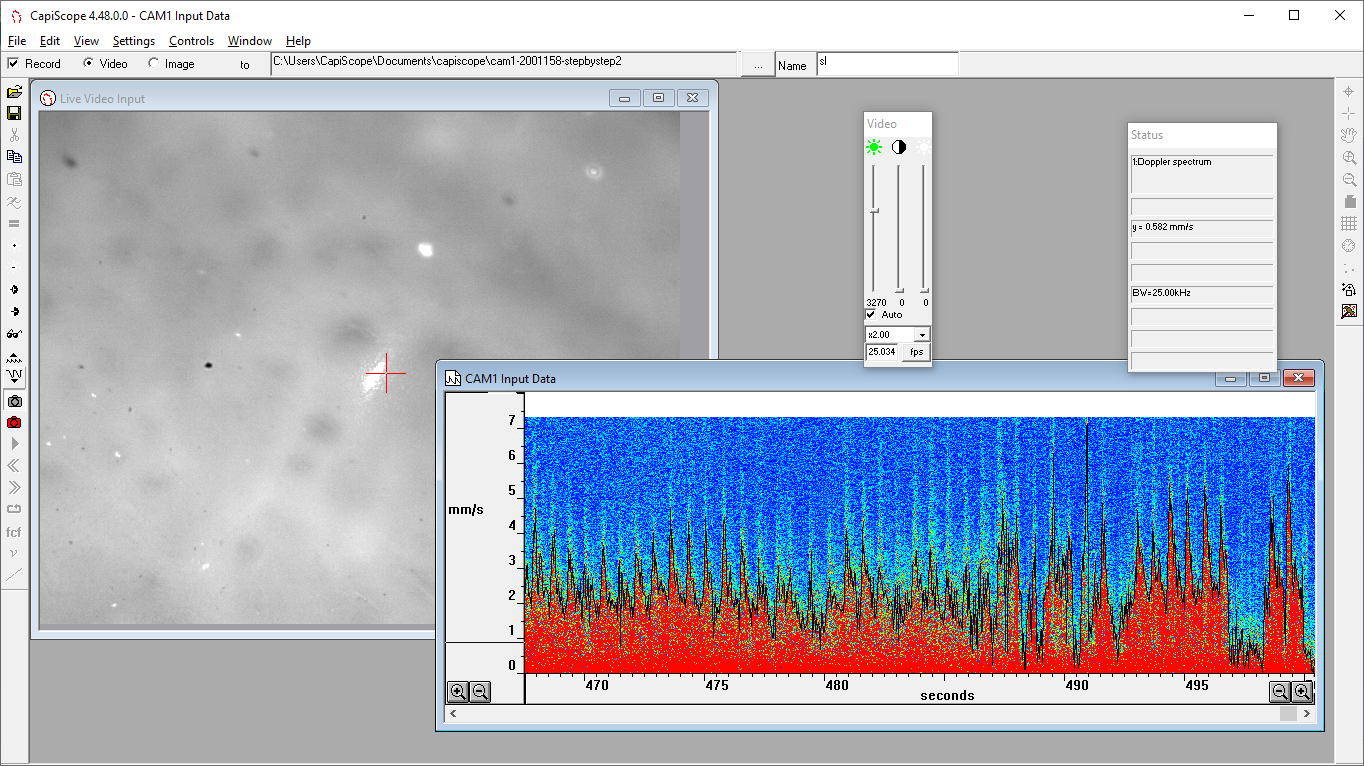
11. Here is a very high CBV where the bandwidth is set too low.
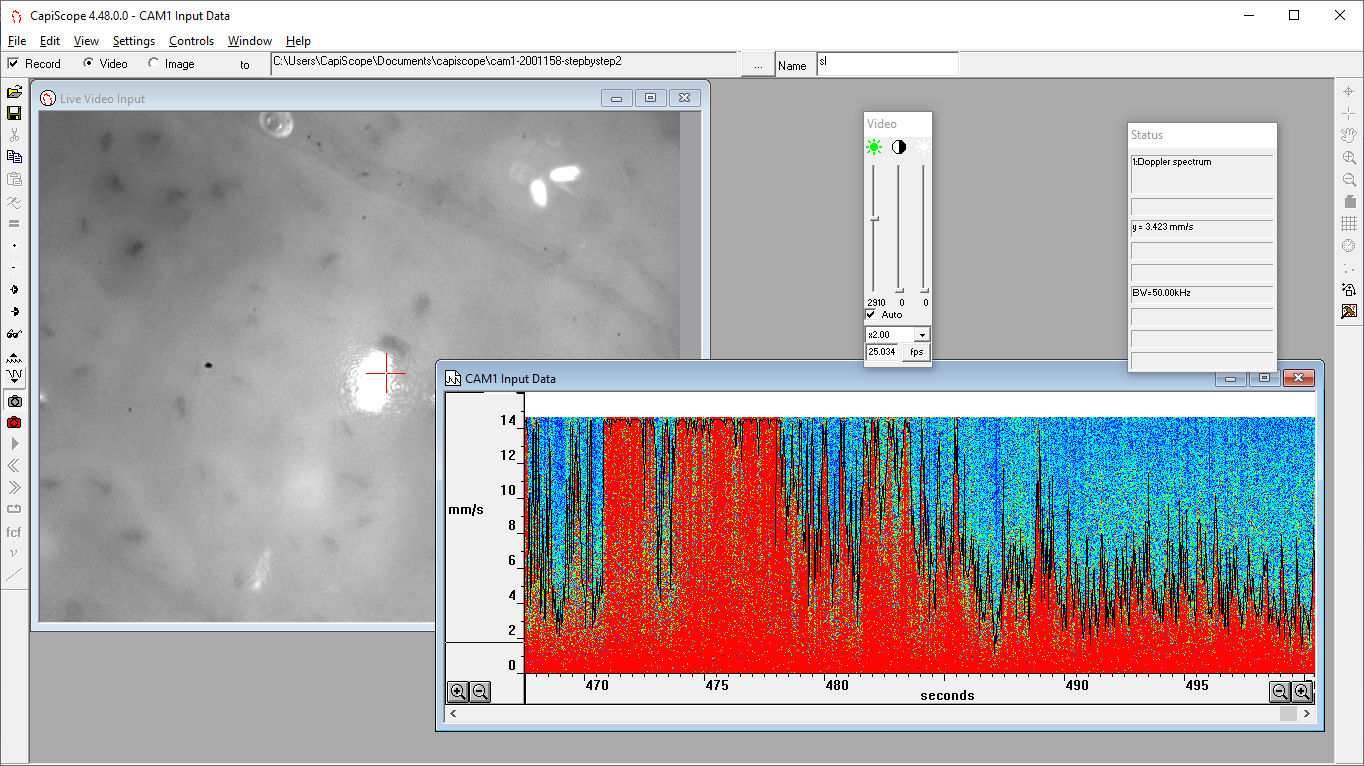
12. Using the bandwidth toolbar buttons the bandwidth has been increased to the maximum 50kHz.
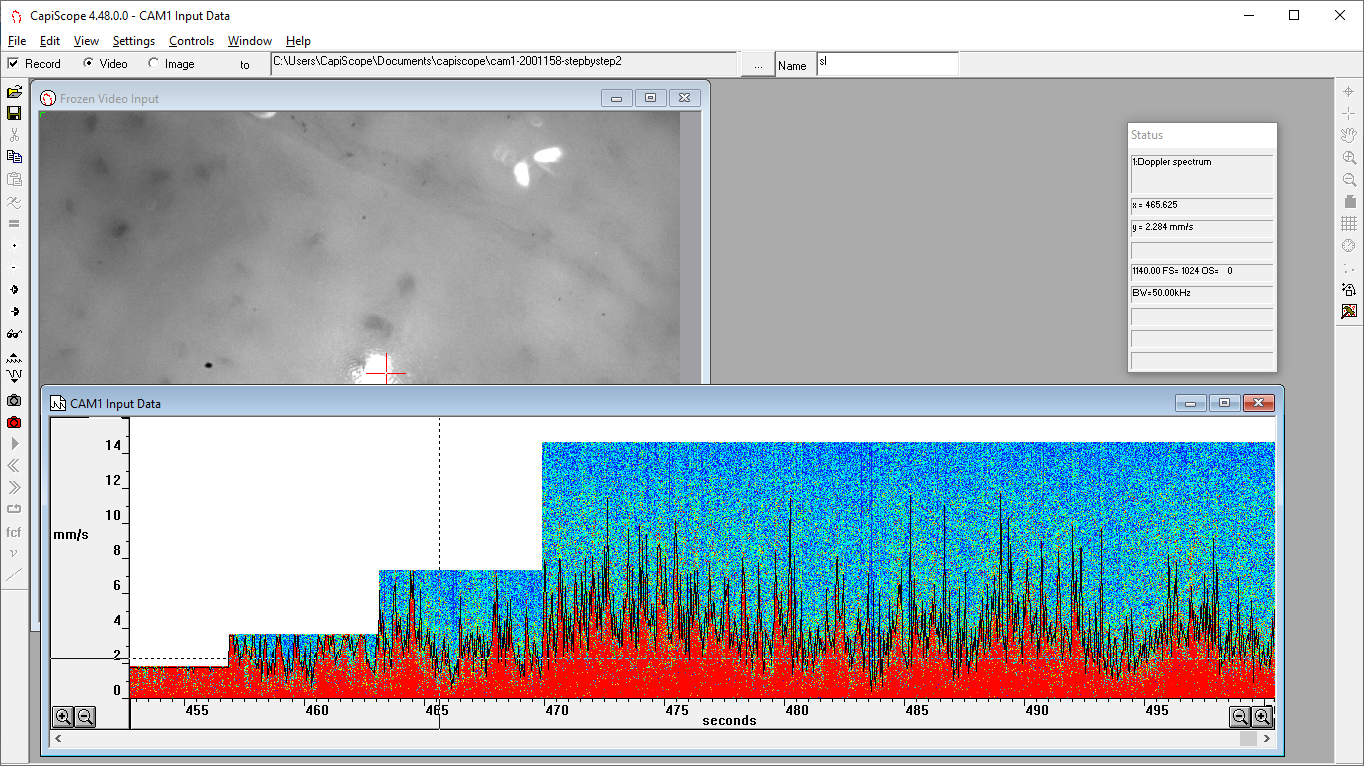
13. How the bandwidth switching looks in the saved Doppler trace.
Demonstration video
Image Markers
14. With the CAM1 window active, use the function key f4 to save the live video image and place a marker on the CAM1 chart.
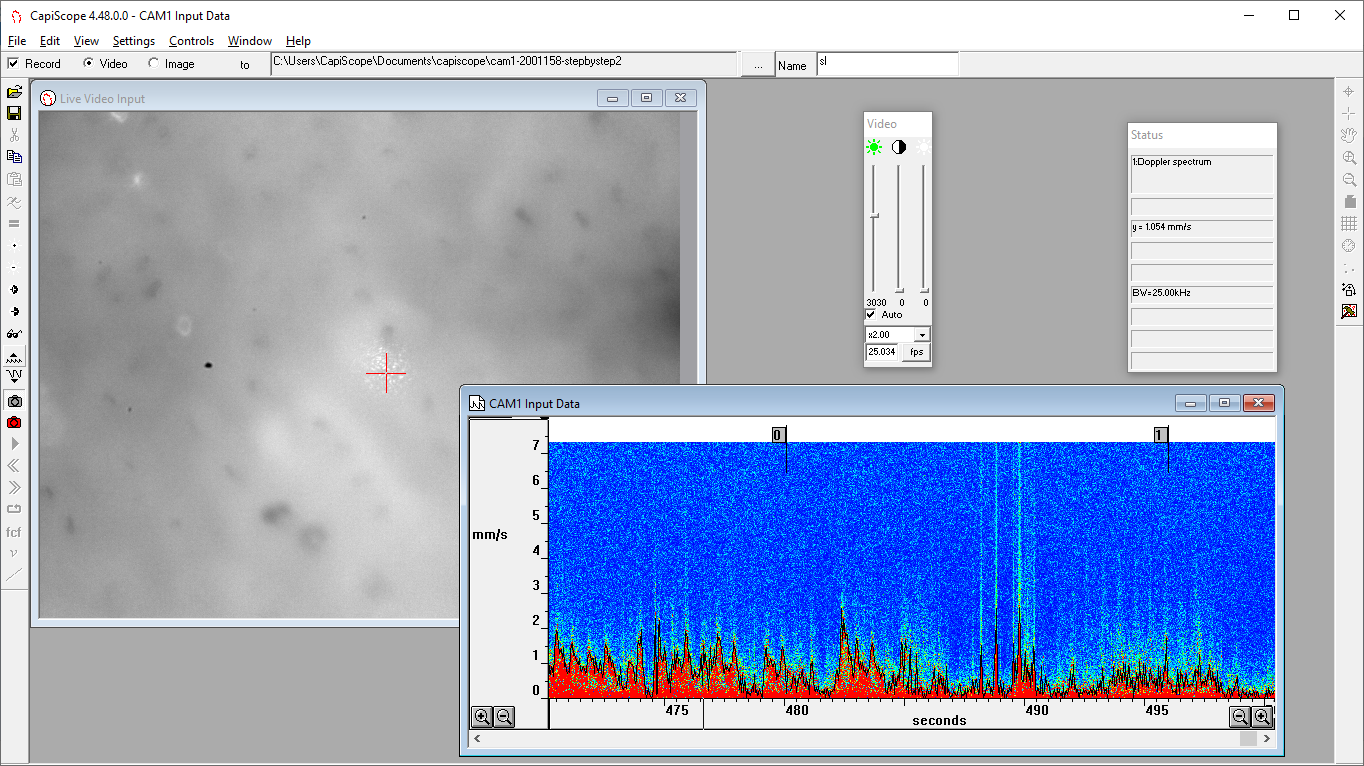
15. Clicking on the marker in the saved CAM1 chart will open the image saved during the recording.
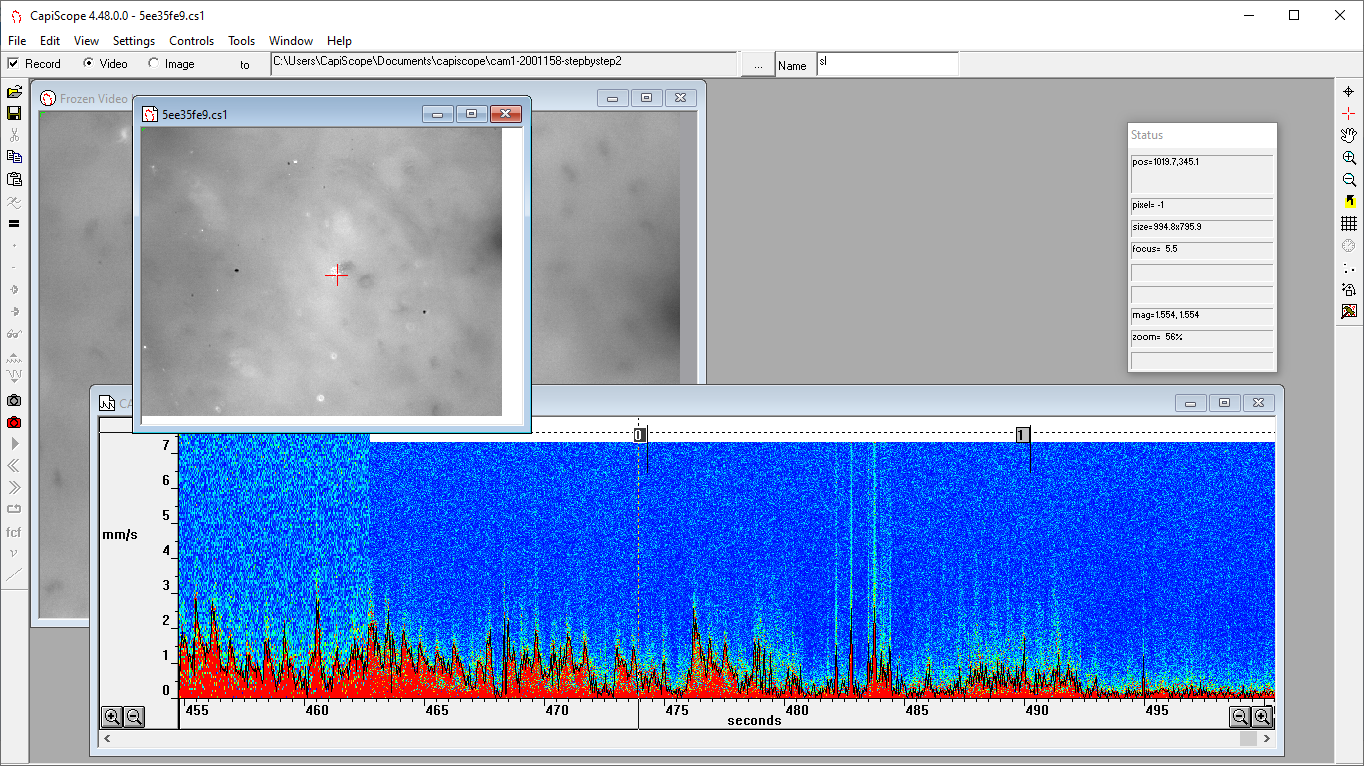
16. To save the CAM1 chart, activate the CAM1 window by clicking on the title bar for example.
Use the toolbar “Save” button to save the CAM1 chart.
Demonstration video
