Magnification Calibration
For image capture devices which have square pixels such as the CapiScope® HVCS, then only one dimension needs to be calibrated.
Line up Graticule with CapiScope® video output and focus as usual. Move
the Graticule so as much of the 1/10 mm scale (x-axis) and the
1/100-inch scale (y-axis) is displayed on the output window. Freeze the
video output with the  icon; click on the
  button
(Measurement) and then on the
button
(Measurement) and then on the  button (Dimension line).
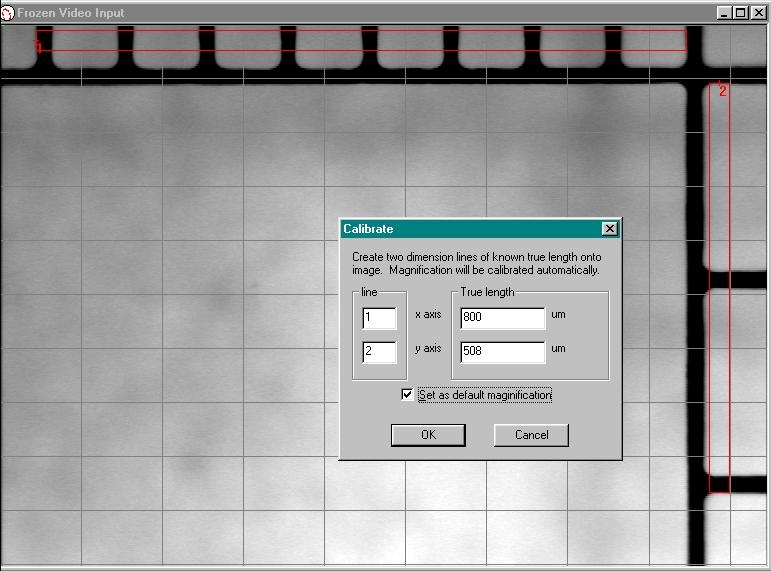
Click on the start of the furthest left black line on the mm (x-axis) scale and then on the start of the furthest right black line on the mm scale. This will be dimension line number 1.
For non-square pixel image capture devices or files, click on the bottom of the topmost black line on the inch (y-axis) scale and then on the bottom of the lowest black line on the inch scale. This will be dimension line number 2.
Alternatively, a single diagonal line can be drawn. The separate x and y components will be used for the calibration.
Click Calibrate Magnification to bring up the Calibration dialog box.
For square pixel images, enter the true length for just the x axis. Leave the y axis blank or enter zero for the y axis line.
For non-square images then enter the true length for both X and Y lines. Note that in the example above, the X scale has divisions of 0.1mm and the Y scale has divisions of 0.1”, which is 254 um.
If using a single diagonal line, enter the same line number for both x and y. Enter the true x and true y distances.
Tick Set as default magnification and press OK.
The current magnification setting is shown in the status box.