Dimension Lines
Overview
Dimension lines can be added manually or automatically for counting, or diameter, velocity or area measurement. There are several types of dimension lines from simple single points to polygonal areas.
Each image in CapiScope® can have three separate dimension lists. Measurement output using the = key only include dimensions in the active Dimension List.
Switch dimension lists using the ‘d’ key on the keyboard or the  switch list button on the right hand dimension list toolbar.
Dimension drawing tools  
Click on the measurement toolbar button to reveal all the
dimension drawing toolbar buttons.
Counting  
For manually counting capillary density. Position mouse over each capillary and click.
Dimension Line  
For measuring vessel diameters, lengths and blood cell velocity.
Click (left mouse button down then up ) for first node then second click for the end node. Line x and y length is shown in the status box as it is drawn.
Polyline  
Allows measurements along vessels that are not straight. Use the same as for Dimension Line using a single mouse click for each node.
Freehand Line  
Draw a freehand line along vessel. Click down and hold left mouse button down to draw along vessel.
Freehand area  
Draw freehand line around capillary loop or other object. Use the same as freehand line. When mouse button is released, the area is automatically closed from last node to first node.
Polygon  
For drawing straight edged areas. Click for each node. Double click or press esc key to end. Shape is automatically closed after final node.
Circles  
For manually measuring areas of capillaries or capillary loops with user estimated circular area.
Single mouse click at each end of diameter of circle.
Find Width  
To automatically measure vessel diameter using the active dimension line. The dimension Line must be perpendicular to the vessel and start and end on background tissue.
If one dimension line is activated, then Find Capillary Width will just measure using that dimension line. If no dimension line is active, then all dimension lines are calculated and the results listed in a Diameter Calculation Results window.
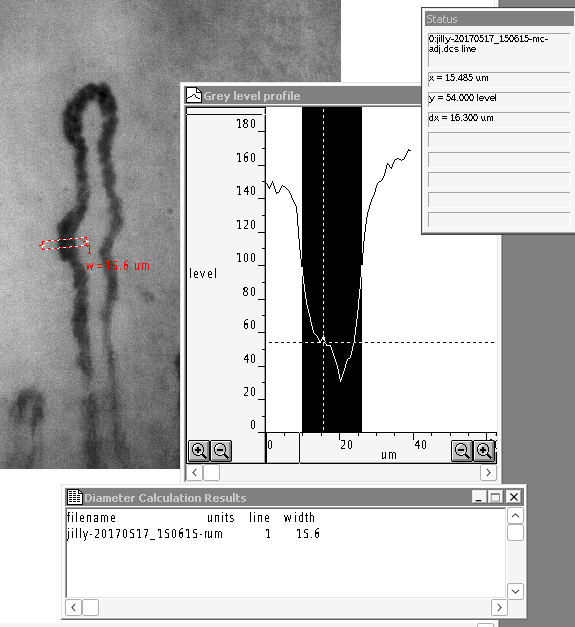
Single capillary line width measurement from active dimension line.
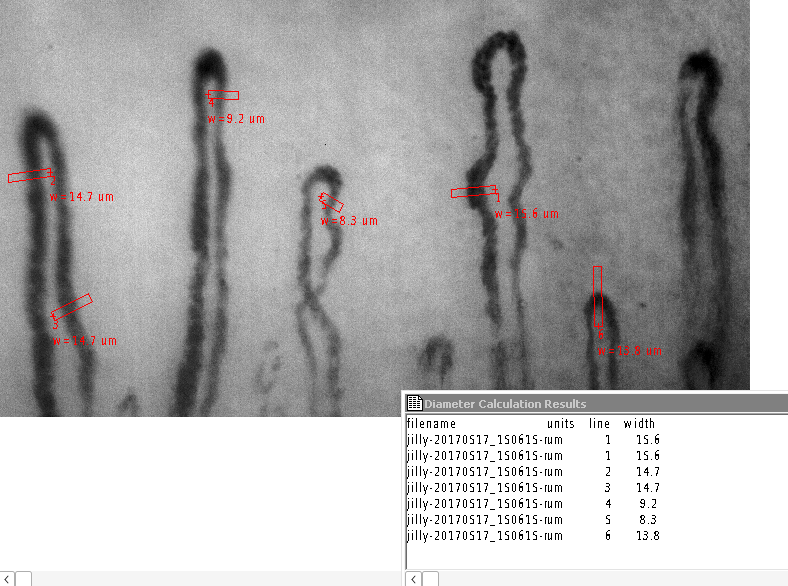
Capillary line width measurements of all dimension lines when no dimension line is active.
The width is measured from the greylevel profile. Better results can be achieved by increasing the line width to say 10 pixels. The greylevel is then averaged across the width of the measurement line.
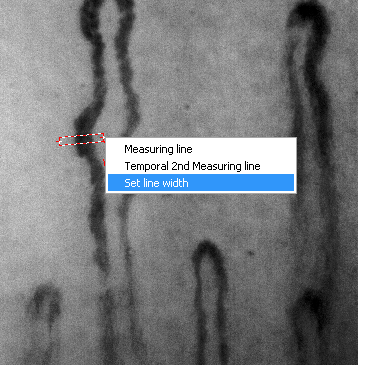
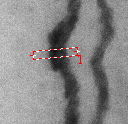
Right click on the first node of the Dimension line to change its width. This width will also then become the new default line width.
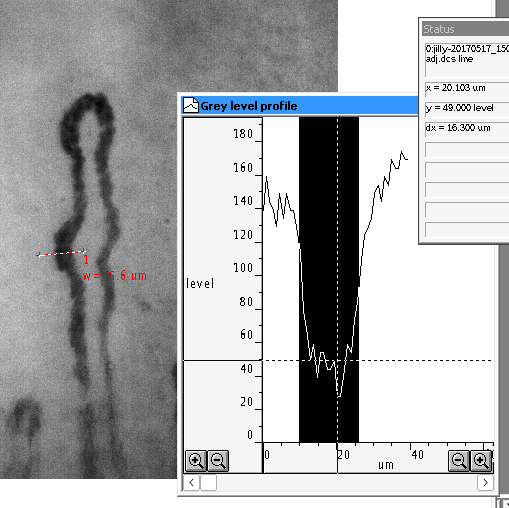
Noisy greylevel profile with a dimension line width of only 1 pixel.
The Capillary width measurement method can be changed using the Work menu ( CTRL-w ) settings, capillary width method….
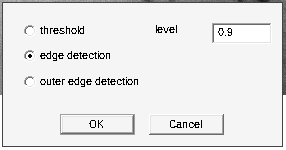
- Threshold
This is similar to FWHM but does it in two parts. The range of the first part is from the minimum to the average of the first part of the greylevel profile above the average of the whole greylevel profile. The range of the second part is calculated in the same way but using the last part of the greylevel profile. The capillary edges are measured between the points where the greylevel profile crosses level * range + minimum. Expects the minimum to be in the central half of the dimension line.
- Edge Detection
This is the default method. It measures the width between the steepest slopes either side of the minimum point. This makes it sensitive to noise, so use a wide dimension line.
- Outer Edge Detection
This uses the second differentiation to find the outer edge of the capillary. It is very sensitive to noise so use a wide dimension line. Expects the minimum to be in the central half of the dimension line.
Nailfold Calculations. Measure loops  
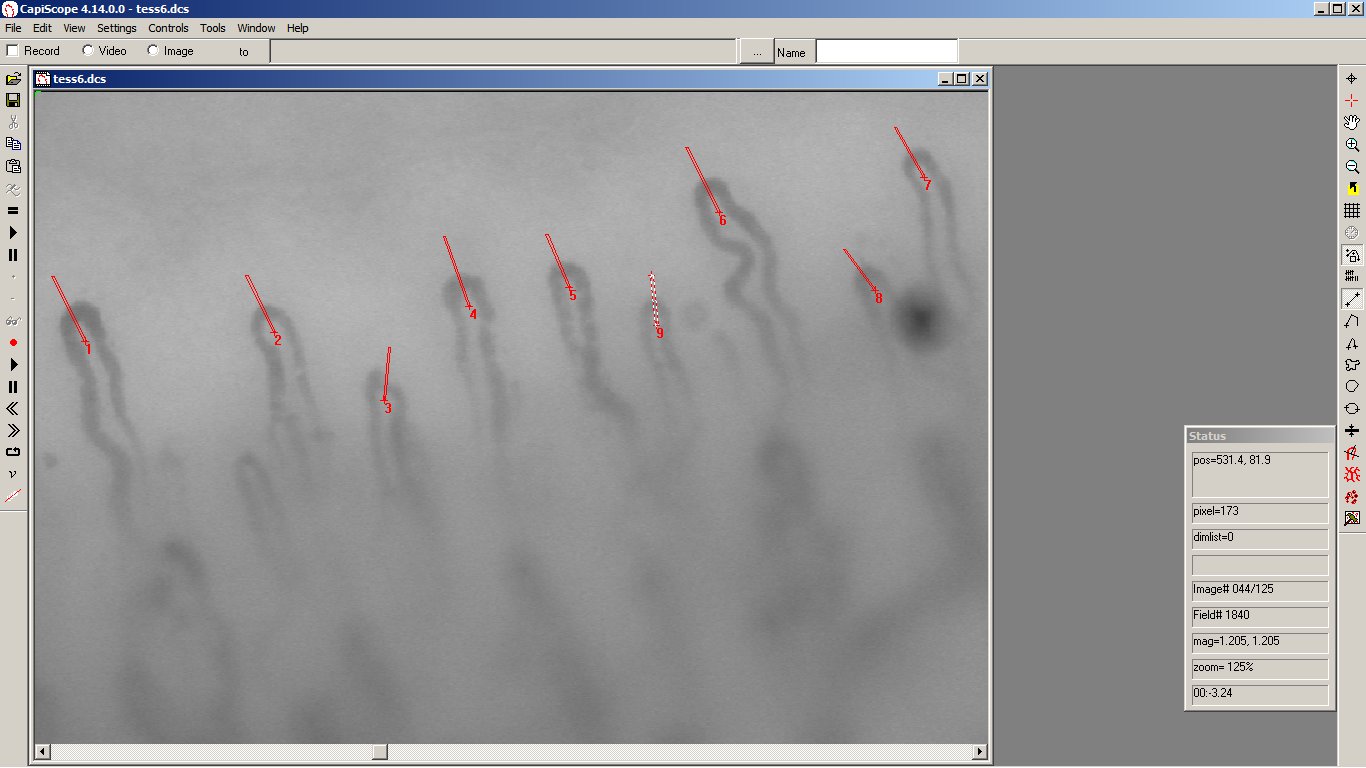
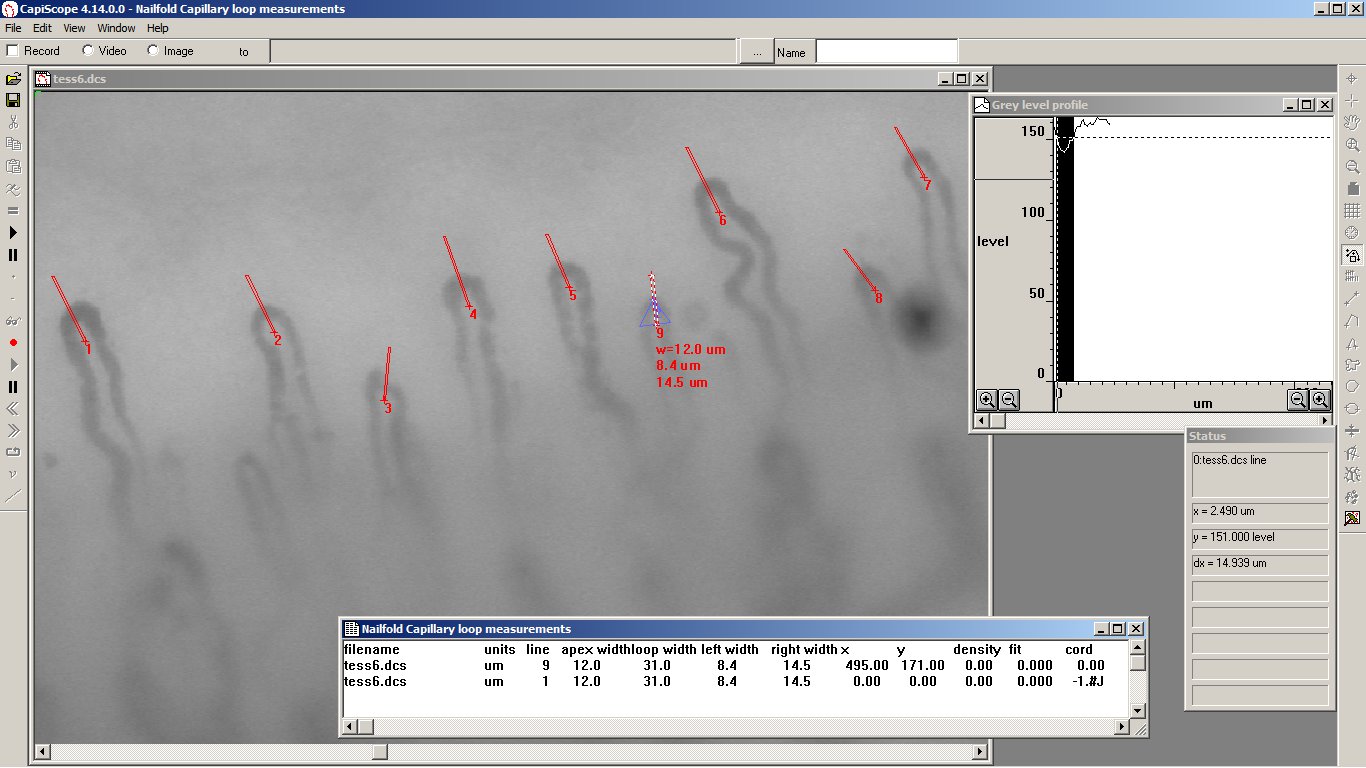
Draw dimension lines across the apex of each capillary loop in the final row of the nailfold.
The start point for each line should be inside the loop and will be the point where the capillary loop width and arterial and venous capillary diameters will be measured.
Any loops where the inside of the loop is not obvious, use the counting dimension toolbar button and mark the apex of these loops.
If a dimension line is selected (shown as red/white line) only that line will be measured.
Click the nailfold calculations measure loops toolbar button.
Press escape to end the line drawing mode and click anywhere so that no lines are selected.
With no dimension lines selected then all loops will be measured.
Click the nailfold calculations measure loops toolbar button.
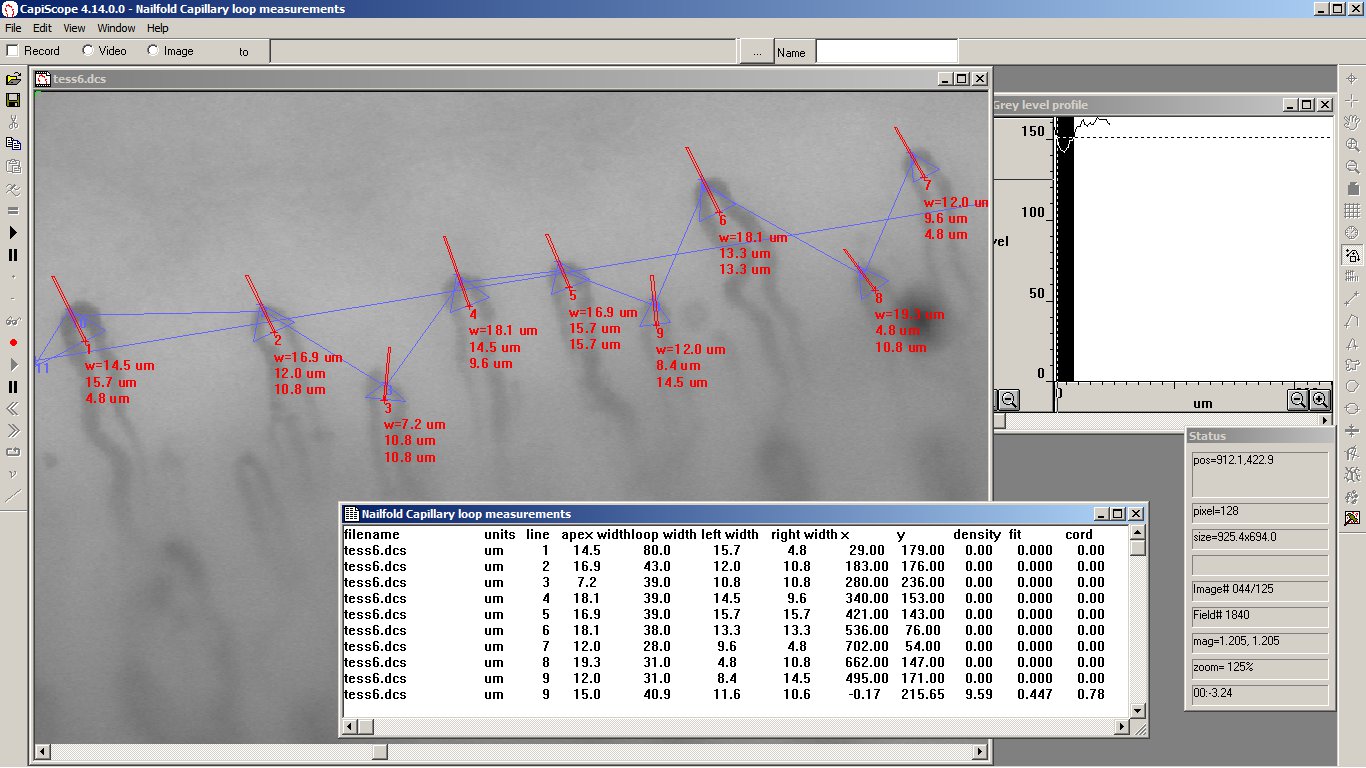
The nailfold capillary loop measurements window shows the list of loop measurements. Individual capillary apex width, left and right limb widths and loop width are shown.
The final line shows average values for all loops. A straight line fit is drawn though the apex points in case the nailfold is not completely horizontal in the image, and the capillary/mm density is calculated along this line.
The Fit value shows how close the apex points are to a straight line. 1 = perfect fit.
Cord is the ratio of the length between leftmost and rightmost loops and the total length between each apex.
To reduce any spurious measurements, increase the dimension line widths or perform a low pass filter on the image.
Trace Capillaries  
Automatically thresholds individual capillaries or vessels. Click on capillary to start thresholding.
Find Capillaries  
Locates capillaries by iterative grey level thresholding in ROI or whole image if no ROI is set.
Use the = key or  button to get capillary density results.
Image filtering and size limits can be set in Settings, Processing.
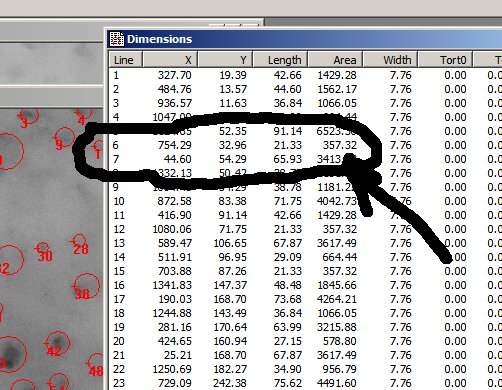
Each identified capillary is marked with a circle dimension line with an area the same as the identified capillary. You can see the individual areas by opening the dimension list window.

Dimension Lists
To step through the lists use the ‘d’ key or the Switch List Toolbar button. The currently active list is
shown in the status box.
Each list has different colour.
Selecting and Editing Dimension Lines
Activate a dimension line by clicking on the first node ( small cross at start of line and next to the line number ). The active dimension line will be shown in the status box together with its length or area.
The line can be dragged to a new position by holding the mouse down on the first node.
The line can be rotated by holding down the ctrl key then dragging the first node.
Activate the next, or previous dimension line using the TAB or SHIFT + TAB keys.
Pressing the DELETE key will delete the active dimension line.
To delete all dimension lines in the active list, use Edit, Clear All dimensions.
Dimension Line Width
To change line width, right click on first node and select Set Line Width from the popup menu.
All new lines will also be drawn with the new line width. Width is in pixels.